Transform Your Workspace with a Custom Pegboard Organizer
If your desk is overflowing with tools, supplies, or creative clutter, you’re not alone. Many people struggle to keep their workspace tidy and efficient—especially when everything ends up in a tangled pile. A custom pegboard organizer is a simple, stylish way to take control of your environment and make sure everything you need is always within arm’s reach. Whether you love crafting, DIY projects, or simply crave a more organized work area, building your own pegboard can be a game changer for both productivity and inspiration.
Why a Pegboard Organizer Is a Game Changer
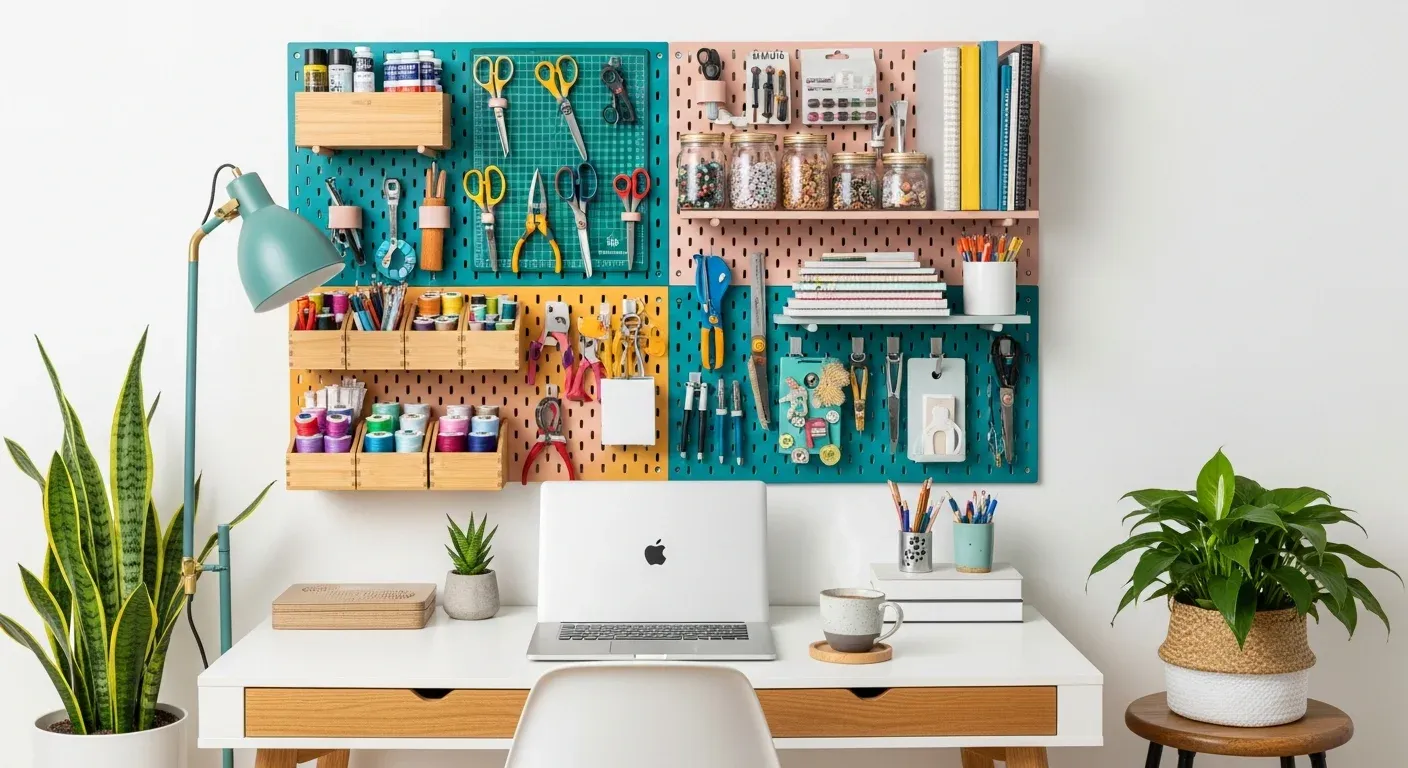
A well-designed pegboard organizer transforms wasted wall space into an adaptable, efficient storage solution that keeps everything visible and accessible.
Pegboards do more than just organize—they let you customize your workspace to fit your unique needs and style. Here’s what makes them stand out:
- Pegboards maximize vertical space, freeing up your desk or counter for actual work.
- You can build a pegboard to any size or shape, and add exactly the hooks, shelves, or bins you want.
- The layout is always flexible—just move accessories around as your workflow changes.
- Your most-used tools and supplies stay right where you can see and reach them.
Before you begin, gather some basic materials: pegboard panels, mounting hardware, spacers, a drill, level, measuring tape, saw, and your favorite hooks and accessories.
Designing Your Pegboard: From Idea to Sketch
Every great pegboard starts with a plan tailored to your space and habits. Taking the time to map out your organizer ensures that it will fit seamlessly into your daily routine and make your workspace truly functional.
Finding the Perfect Spot and Size
Start by choosing a wall near your main work area—above your desk, workbench, or crafting table are all good options. Measure the available space, considering both width and height, and think about how many items you want to store. This helps you decide how big your pegboard should be.
Picking the Best Materials
Pegboards come in several materials, each with its own advantages:
- Wooden pegboards have a classic, sturdy feel and are easy to paint or stain.
- Metal pegboards offer a modern look and can be magnetic for even more versatility.
- Plastic pegboards are lightweight, affordable, and come in a range of fun colors.
Sketching Your Layout
Draw a rough plan of your pegboard, deciding where each tool, shelf, or container will go. Consider:
- The size and type of items you’ll be hanging
- Arrangements that keep essentials easy to grab
- Leaving room for new additions or changes in the future
Materials and Tools: What You’ll Need
A little preparation goes a long way. Gathering all your materials and tools ahead of time makes the building process smoother and more enjoyable.
Materials Checklist
- Pegboard panels, cut to your chosen size
- Mounting hardware: screws, wall anchors, washers
- Spacers to keep the pegboard away from the wall
Tools Checklist
- Drill with bits suited to your wall type
- Level
- Measuring tape
- Saw (for cutting the pegboard)
- Pencil for marking measurements
Accessories to Consider
- Hooks in a variety of sizes and shapes
- Small shelves or bins for bulkier items
- Baskets
- Magnetic strips (for metal pegboards)
- Labels or holders for easy identification
Building Your Pegboard: Step-by-Step Instructions
With a clear plan and the right materials, building your custom pegboard is a rewarding and straightforward DIY project.
1. Measure and Cut
- Mark your desired dimensions on the pegboard panel using a measuring tape and pencil.
- Use a saw to cut the panel to size, and sand down any rough edges for a clean finish.
2. Mount the Pegboard
- Hold the pegboard against the wall and use a level to make sure it will hang straight.
- Attach spacers at each corner and along the edges to create space for hooks behind the board.
- Drill screws through the pegboard, spacers, and into wall anchors for a secure hold.
3. Arrange Accessories
- Place hooks, shelves, bins, and baskets according to your sketched layout.
- Adjust the arrangement as you add or change tools, making sure everything is easy to reach.
Personalizing Your Pegboard for Maximum Efficiency
Now comes the best part—making the organizer truly your own. A thoughtfully arranged pegboard not only saves time but also keeps your workspace inspiring and enjoyable.
Organizing Tools and Supplies
Group similar items together—scissors with cutters, screwdrivers with pliers, paintbrushes with markers. Keep your most-used tools at eye level or within easy reach, and use shelves or bins for larger supplies.
Creative Labeling and Color-Coding
Attach labels to hooks or bins so it’s clear where everything belongs. Try painting sections of your pegboard or using colored accessories to separate categories or highlight important tools.
Keeping Your Organizer Fresh
Regularly reviewing and updating your pegboard helps maintain order and adapt to new projects. Rearrange tools as your needs change, add new hooks or bins, and take a moment to wipe down the surface to keep it looking sharp.
Enjoy the Benefits of an Organized Workspace
A custom pegboard organizer is a simple project that pays off every day, offering lasting order, inspiration, and flexibility for any workspace. With a little planning and creativity, you’ll gain a clutter-free environment that makes work more enjoyable and efficient, with tools and supplies always at your fingertips.
Grab your tools, get creative, and enjoy the satisfaction of a workspace that’s both beautiful and brilliantly organized. With your pegboard in place, you’re ready to tackle any project with confidence and clarity.